
I love Spoon Necklaces!
This tutorial will show you how to make your own personalized spoon necklace.

What You Will Need:
-Spoons (Get them from a thrift store. Get at least three in case you mess up the lettering)
-Hammer or Heavy Mallet
-Sand Paper
-Pliers
-Steel Wool or Heavy Nail File
-Metal Letter Stamps (Any hobby store will have them)
-Sharpie
-Hand towel or towel
-Twine or a Small Rope for the necklace
Optional if you want to decorate your necklace:
-Headpins (Flat or Circle head)
-Beads


First, you will need to hammer the head of the spoon flat.


Next, rub the maker off with the steel wool:


-Spoons (Get them from a thrift store. Get at least three in case you mess up the lettering)
-Hammer or Heavy Mallet
-Sand Paper
-Pliers
-Steel Wool or Heavy Nail File
-Metal Letter Stamps (Any hobby store will have them)
-Sharpie
-Hand towel or towel
-Twine or a Small Rope for the necklace
Optional if you want to decorate your necklace:
-Headpins (Flat or Circle head)
-Beads


LET'S BEGIN
First, you will need to hammer the head of the spoon flat.
Find a very hard surface, like concrete. Lay your hand towel down.
If you have a heavy mallet:
Begin to hammer the head of your spoon until it's as flat as you want it to be
If you have a hammer:
Make sure the spoon is covered with a towel before you hit it so your hammer doesn't scratch the spoon, then hammer the spoon until it's a flat as you would like it to be
If you have a heavy mallet:
Begin to hammer the head of your spoon until it's as flat as you want it to be
If you have a hammer:
Make sure the spoon is covered with a towel before you hit it so your hammer doesn't scratch the spoon, then hammer the spoon until it's a flat as you would like it to be

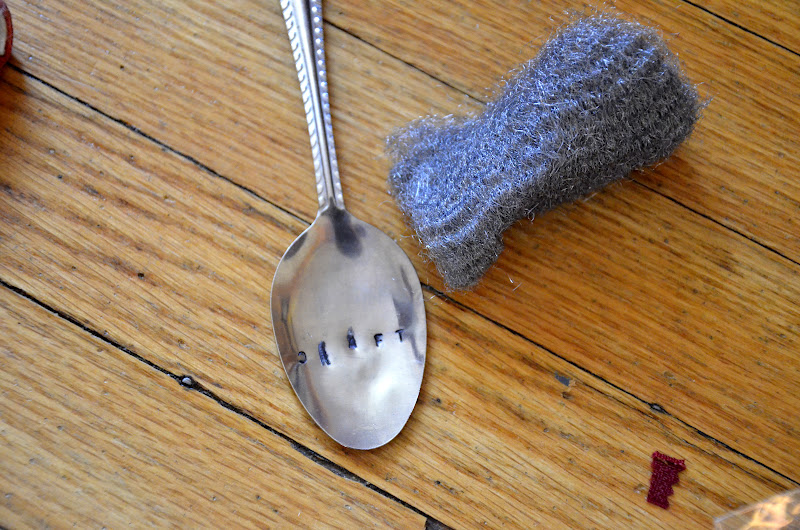
Pick a word for your spoon.
I choose the word: CRAFT
In a row, place a dot for each letter.
These dots will help when you are stamping the letters on the spoon.
(Click on photo to Enlarge)
I choose the word: CRAFT
In a row, place a dot for each letter.
These dots will help when you are stamping the letters on the spoon.
(Click on photo to Enlarge)

Once your dots are on you are ready to stamp on the letters.
I would HIGHLY recommend stamping your letters on a concrete surface with your towel underneath.
Stamp the middle letter First, then work your way out.
STAMPING TIPS:
Hammer the metal stamp once with a strong hit. This will give you a clean stamp.
I am not strong enough to do a stamp with one hit, so this is my advice to you if you're in the same boat.
Make sure your stamp and spoon do not move when you are hammering. Notice the letters on my spoon are a little "smeared". That is because the stamp and/or spoon moved when I was stamping it.
(This is why I said make sure you buy at least three spoons so you can practice)
Keep the spoon and metal stamp steady to get a good clean letter.
(This is why I said make sure you buy at least three spoons so you can practice)
Keep the spoon and metal stamp steady to get a good clean letter.

After all your letters are stamped, color the letters in with a sharpie.
This will give the letters some dimension.

Next, rub the maker off with the steel wool:
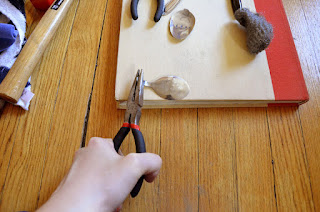
Now you will need to break off the handle.
Make sure you leave enough room to make a loop for your necklace like the photo below.
Bend the spoon until the handle breaks off.
Use the sandpaper to smooth out the raw edge you just made.
Make sure you leave enough room to make a loop for your necklace like the photo below.
Bend the spoon until the handle breaks off.
Use the sandpaper to smooth out the raw edge you just made.

Use your pliers or your hands to bend the handle toward the back of the spoon.
Use a hammer to make sure the handle touches the back of the spoon.
Cover the spoon before using your hammer.

If you want to decorate your spoon necklace, lace beads onto a headpin
and attach it to the necklace cord.
and attach it to the necklace cord.

If you are using a circular headpin: use your pliers to open the circle, attach the headpin to your cord, then close the circle back up. Add beads to it, then fold the remaining wire up toward the beads to make sure the beads stay in place.
If you are using a flat headpin: add beads first, use the remaining wire to create a loop, and then attach the headpin to the cord.

YOU'RE FINISHED!!

This would make a great bible school project for teens.
ReplyDeleteI love the spoon necklace idea! How innovative!
ReplyDeleteLove this so much! Very easy for impatient crafters like me who hate waiting to start a project!
ReplyDeletetried it. failed miserably :( did you heat your spoon to get the handle to wrap around the back?? Mine kept breaking ( but I used cheap "all a dollar" spoons)...any suggestions?
ReplyDeleteI would suggest using a stronger spoon. Try a thrift shop. Their spoons are cheap and pretty strong. That's where I get mine. I used a pair of pliers and a hammer to bend my spoon handle back.
ReplyDeleteWow, these pictures are impressive, and that pendant is cute. But we can probably use one aluminum sheet to replace that strong spoon. I'm sure that would reduce the difficulty of the production.http://www.charmjewel.com/letter-necklace/
ReplyDelete