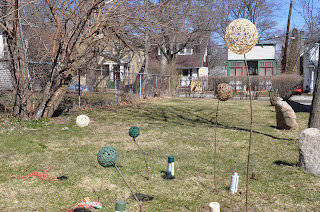
Here's a cool way to add a little flair to your home, office, or studio!
This project was hella fun and the yarn balls can be crafted to suit your particular aesthetic!
This project was hella fun and the yarn balls can be crafted to suit your particular aesthetic!
I made mine different sizes and colors to mix it up a little:
What You Will Need:
1 Bottle of Elmer's Glue
Balloons (Medium to Large)
Corn Starch
Water
Measuring Cup
100% Cotton Yarn: white or light in color. I chose a lighter color since I spray painted mine and I didn't want any other color to come through.
Fishing Line to hang them
*If you are doing this project inside you will need a Dollar Store Shower Curtain to help with the mess!
Let's Begin:
We're going to follow the same steps from my Yarn Ball Hanging Lamp post, but we'll stop before the light kit part.
Start by hanging your balloons from a rope tied between two chairs.
Make sure you do not inflate the balloon to its fullest capacity since you want the balls to be round and not oval. However, if an oval is what you're into, go for it!!
Make sure you do not inflate the balloon to its fullest capacity since you want the balls to be round and not oval. However, if an oval is what you're into, go for it!!
Vary the sizes of the balloons you're going to wrap.
Lay your shower curtain or tarp down to prevent any glue spills.
If you're outside you're good to go!
If you're outside you're good to go!
Now we will mix the paste:
Mix:
1/4 Cup of Water
1/2 Cup of Corn Starch
1 Bottle of Elmer's Glue
It should be runny, but not watery.
Go back to your balloons.
Begin by wetting the yarn in the paste and wrapping it around the balloon.
Begin by wetting the yarn in the paste and wrapping it around the balloon.
You wet the yarn by dipping your fingers in the glue and covering the yarn.
OR
Dripping the yarn directly in the glue then pulling off the excess glue with your fingers.
Dripping the yarn directly in the glue then pulling off the excess glue with your fingers.
Start wrapping the Balloon:
Keep wrapping the balloon until you are satisfied with how it looks:
Allow the yarn to dry for 12 hours or overnight to make sure it's completely dry.
Once it's dry, pop the balloon and remove it from the yarn ball.
You will have something that looks similar to this.
Mine's a bit warped since the humidity has been so high where I live, but it still looks cool!
Mine's a bit warped since the humidity has been so high where I live, but it still looks cool!
Here's the fun part.
I took mine outside and spray painted them!
Find some sticks and push them into the ground. Hang your yarn balls from them and spray away!
This yarn ball art project could make pretty cool lawn ordiments as well!
Once the paint dries, tie some fishing line to them, and hang them at different lengths from the ceiling.
Don't think about it too hard!
It took me a couple of tries before I got mine the way I wanted them.
Don't think about it too hard!
It took me a couple of tries before I got mine the way I wanted them.
Check it out!
How cool, right!?!
How did yours turn out?
Feel free to post a photo below.
Feel free to post a photo below.


Wonderful! A little purple spray paint and a long green stick and I have my favorite Gladiator Allium. Thank you for a great tutorial.
ReplyDeleteThank you! I'm going to use this for my wedding coming up in May!!
ReplyDeleteCan you use a differnet type of glue, or does it have to be that mixture?
ReplyDeleteI depends on the type of glue you want to use. I have tried to do this with straight elmers and modge podge and they didn't turn out as well. Good Luck on your project!
ReplyDeleteWhat size bottle of Elmers did you use?
ReplyDeletecan I use crochet thread ?
ReplyDeleteEach & every tips of your post are awesome.
ReplyDeleteIt’s great to know about many things from your website blog.
ReplyDeleteI blog frequently and I seriously appreciate your information.
ReplyDeleteI really love the theme/design of your website.
ReplyDelete