Sunday, July 24, 2011

Easy Home Decor Repurposed Paper Roll Wall Art Project


This is probably one of my favorite DIY projects.
It took me a while to collect the paper rolls, but it was well worth it.
Who knew paper rolls could turn into sweet wall art!!
This project is incredibly versatile, so don't be afraid to get creative with it. 


Initiating DIY...


What You Will Need:
Paper Rolls - I used 9 toilet rolls and 1 paper towel roll
Elmer's Glue
Scissors
Pack of Laundry Pins or Paper Clips


Start by flattening the paper roll.


Then cut the paper roll into 5 equal parts.


Do this to all of your paper rolls.


Lay them out and start placing them into random positions.
You could also do something more specific like flowers or a patterned design.
Don't think about it too much!


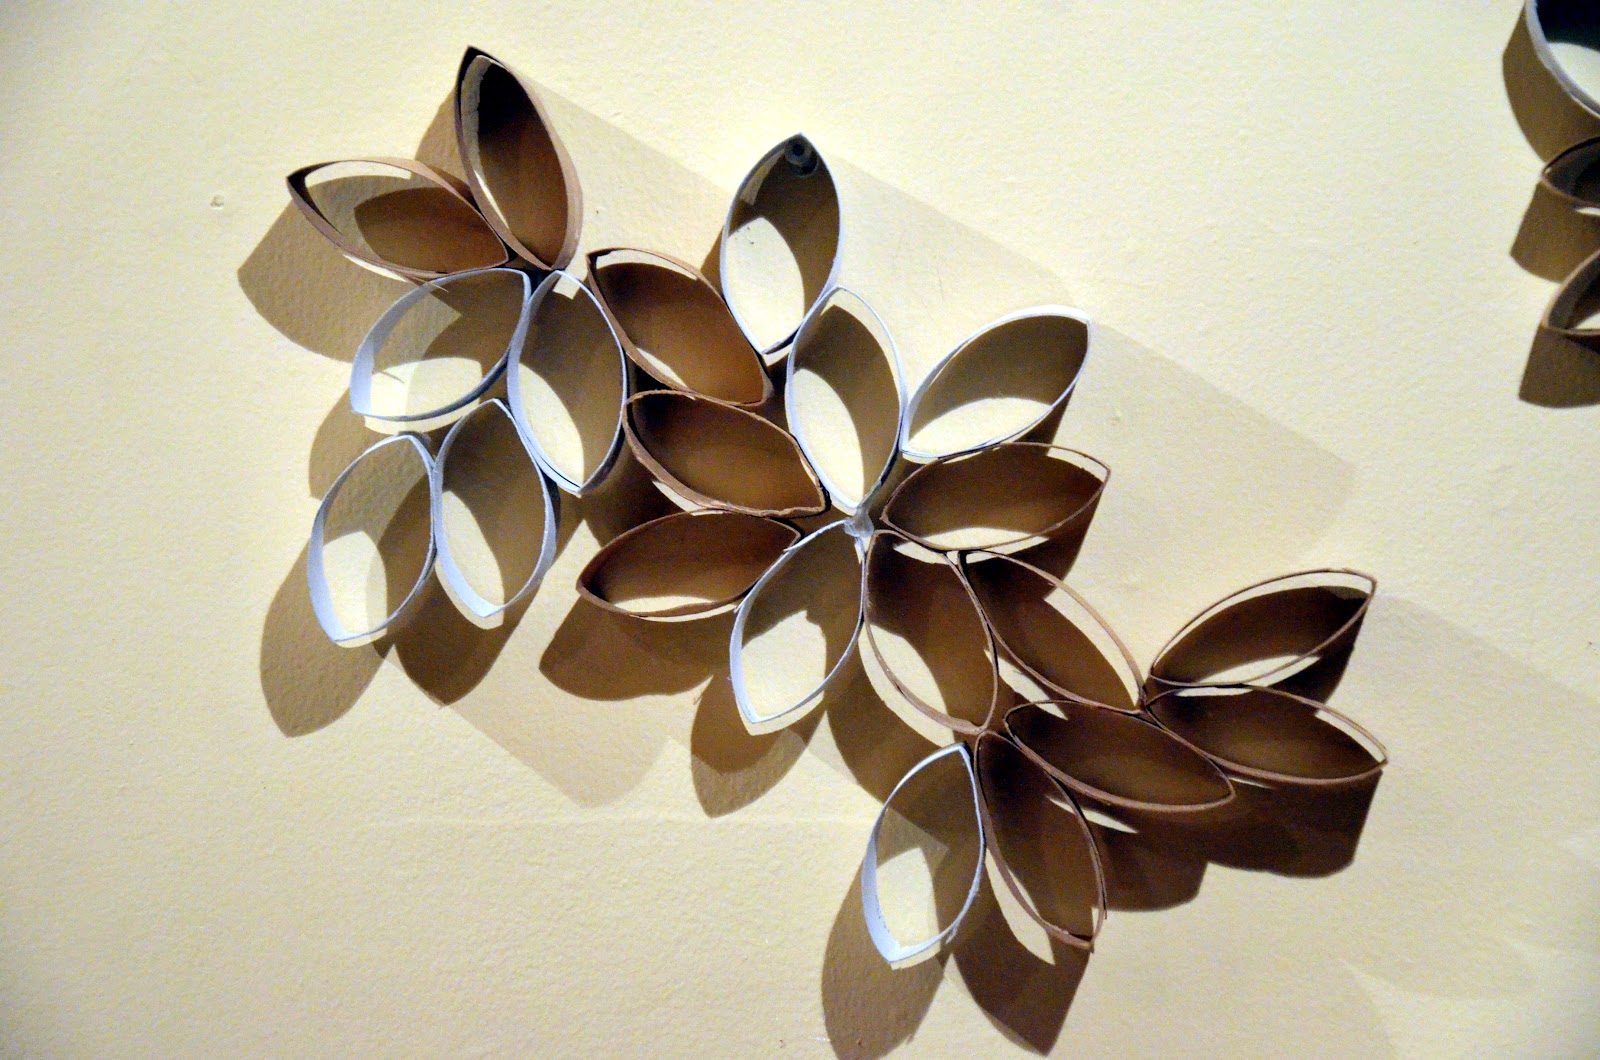
I ended up with a design like this:


Now we'll glue the paper roll cut-outs together:


Begin by picking up one piece of roll and gluing it to the piece next to it:


To make sure the glued area stays together, place a laundry pin or paper clip on the area where you glued:


Repeat that step for the entire design:


Keep the pins on for at least 30 minutes!


When it's dry, pull the pins off, and hang your new wall art! 

Here's how mine turned out!
I put them up in my kitchen.


Bonus!
Spray paint or hand paint them to add some flair.
I decided to keep mine how they were since I like the natural brown paper look.

HAPPY CRAFTING, FRIENDS!!

DIY Home Decor Wall Art Repurposed Ball Jar Lids


Here's an easy way to create unique home decor + art from ball jar lids. 
They look really cool if you make 4 + of them and collage them on your wall.


What You Will Need:
Ball or Mason Jar Lid
Glue (White glue or Hot Glue)
Paper (I used watercolor paper because it is thick)
Scissors
Pen
Something to decorate it with: Paint, Pens, and/or Magazines. I used Mod Podge and Magazines to decorate mine, but you could paint, color, or draw a picture on it!


 Start by laying your lid on the piece of paper and tracing a circle around it:


Cut out the circle:


Fit your circle into the lid.
You may have to cut more off the edges to make it fit:


Take the paper out and decorate it!!

I used Mod Podge and magazines scraps to make mine:


Glue around the inside of the lid:


Push your decorated circle into the lid.
Press the circle into the glue.


Optional:
Add glue to the backside of the paper if you want to glue the other piece of the lid to the back
You don't have to do this! Just an option.


Push down to secure the lid to the paper:


YOU'RE FINISHED!!!


These hang on the walls easily.
Make a bunch of them to create a cool wall collage!
Sell them at your local farmer's market or in your Etsy store!

Happy Crafting!!

Saturday, July 23, 2011

DIY Floral Headband Using an Artificial Flower


Earlier this week I showed you how to make your own flower for a floral headband. 

Today I'll show you how to make a flower headband out of an artificial flower found at any craft store.


What you will need:
 Glue gun
An artificial flower from a craft store
Scrap piece of fabric
Scissors
1 Headband

I bought my headbands at the Dollar Store at 3 for $1!! 


Start by pulling the stem out of the flower:


Then cut the rest of the stem off.


Go to the Mirror and put the headband on.
Move the flower back and forth to see where you want it to be placed.

Hold that spot with your finger, go back to your glue gun, and glue the flower to the desired spot.

I like mine on the side of my headband. 


Cut out a circle from your scrap piece of fabric.
You will use the circle to help secure the flower to the headband.


Glue the circle to the headband and to the bottom of the flower.


YOU'RE FINISHED!!


BOOM!


Adorable floral headband!

Who knew it could be so easy?

Easy Repurposed Mason Jar Wall Vases!


I LOVE Mason Jars.

There are so many uses for them!

This tutorial will show you how to make a mason jar vase for your wall!

You can use them for flowers or plants, paintbrushes, or makeup brushes!


WHAT YOU WILL NEED:
A piece of wood. I went to the dollar store and bought a circular piece of wood.
Matte Mod Podge, a crafter's best friend
Paint Brush
Magazines - If you don't have magazines, you could paint the wood!
Picture hanging kit. I also bought this at the dollar store.
Small Mason Jar. Thrift stores usually have a ton of them!
Medium Pipe Clamp. Purchase at any home improvement store.
Power Drill. If you do not have a power drill use small nails will a medium head on them.
Small Screws with rimmed heads


Let's Begin:

Start by ripping up old magazines.
Paste the magazines onto the piece of wood with Matte Mod Podge. 

I like a mixed media look, so I made mine like this:


Now we'll attach the Mason Jar to the pipe clamp. I wanted my jar to hang in the middle of my piece, so I drilled a screw a little bit above the center of the circle. 

DO NOT drill the screw all the way into the wood!
You want the pipe clamp to fit under it.


Place the pipe clamp under the first screw:


Drill another screw right below the top screw to secure the pipe clamp.

Again, DO NOT screw the screws all the way in yet.


 You want to slide the pipe clamp back and forth to adjust where you want it.


Tighten the pipe clamp enough to hug the jar, but allow room to remove the jar:


Take the jar out and screw the screws all the way down to fasten the pipe clamp to the wood.
Put your jar back in and tighten the pipe clamp around the jar.

Turn the wood face down and hand-screw a wall hanger into the back of it.


TA-DA!

YOU'RE DONE!


Put a candle in it:


Put flowers in it:


Use these in your bathroom to hold makeup brushes, in your kitchen to hold cooking utensils, or in your studio to hold paintbrushes! 

Happy Crafting!!